The soundcheck is designed to test your computer and microphone setup to ensure they are compatible and ready to broadcast before going on-air. Please see below for some common ways to resolve issues which will stop you passing the soundcheck.
Use Google Chrome Browser
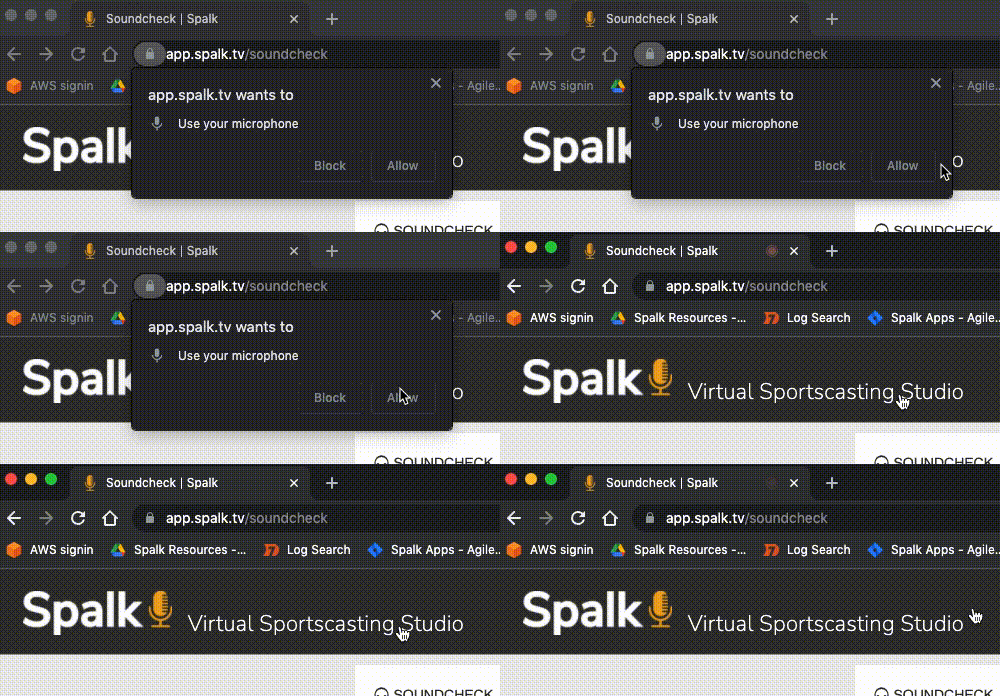
Make sure you are using Google Chrome. If not, please close your browser and login on Google Chrome and continue the soundcheck. If you don't have Google Chrome, you can download for free here. If you aren't sure if you are using Google Chrome or not, make sure the icon looks like the picture below:

Allow Microphone Access
If you have confirmed you are using Google Chrome, you may not have allowed Spalk to access your microphone yet. This will show a message on the screen, and there will be a banner asking you to give Spalk permission to access the microphone to the left of the URL (https://app.spalk...). Please click allow.

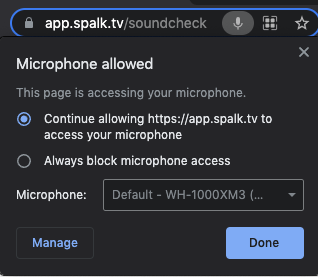
If you cannot see this banner, please click on the microphone icon on the right end of the URL field. It should show that you have allowed access to the microphone.

If this is set to block the microphone, please change to "Always allow https://app.spalk.tv to access your microphone".
Once you have allowed microphone access, click "retry" to restart the soundcheck with the new settings.
Check System Audio Settings
If you are still unable to complete the soundcheck, please check your system audio settings. These instructions are different for Mac and Windows:
Mac:
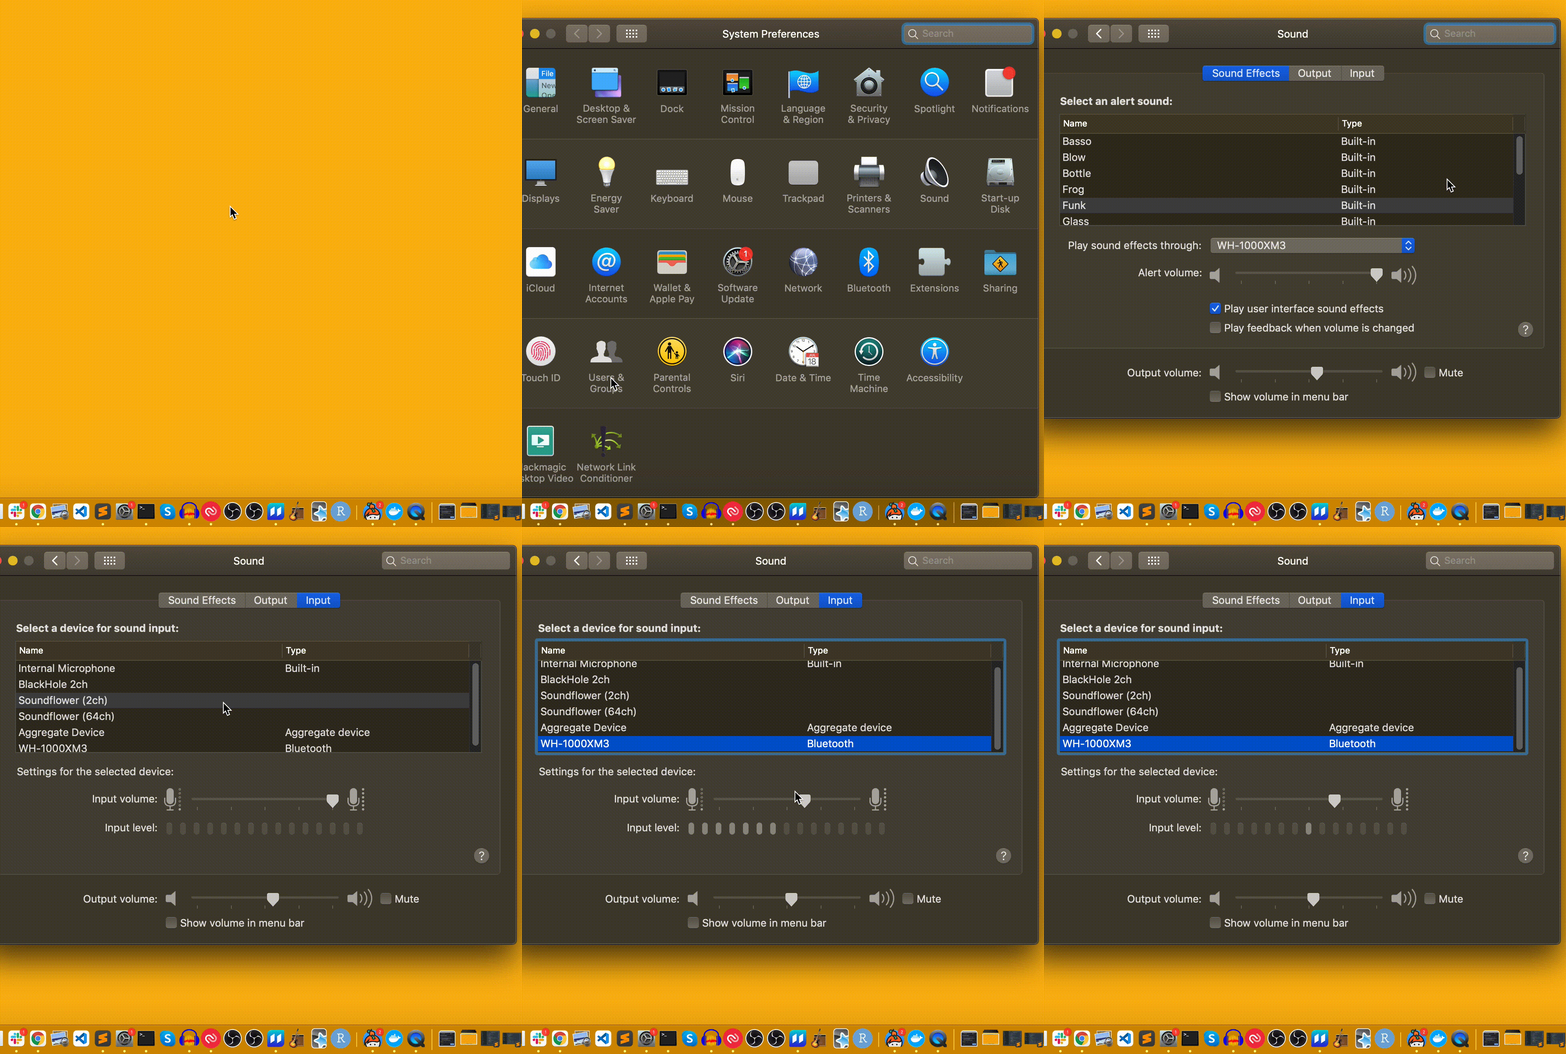
- Open the System Preferences application.
- Click on the Sound section
- Click on the Input section
- Select the input audio device you want to use. This should be the name of your external microphone.
- Ensure you can see the activity levels (VU Meter) moving when you speak into the microphone. If the levels aren't moving, the microphone may not be plugged in correctly, be powered off, or is not sending any audio to the computer.
While you are here, you should also check if the microphone input volume is set to the right level by following 3 simple rules:- Even when you are maximum voice energy (yelling), the microphone should reach the top of the bar
- When you are talking normally (like during a broadcast) it should be between 40% and 60% of the full meter.
- When you are silent there should be no activity. If there is activity the levels are too loud.

Once you have ensured the correct microphone is working and selected, you are ready to restart the soundcheck. If it still doesn't pick up your microphone, you may need to restart Chrome.
Windows:
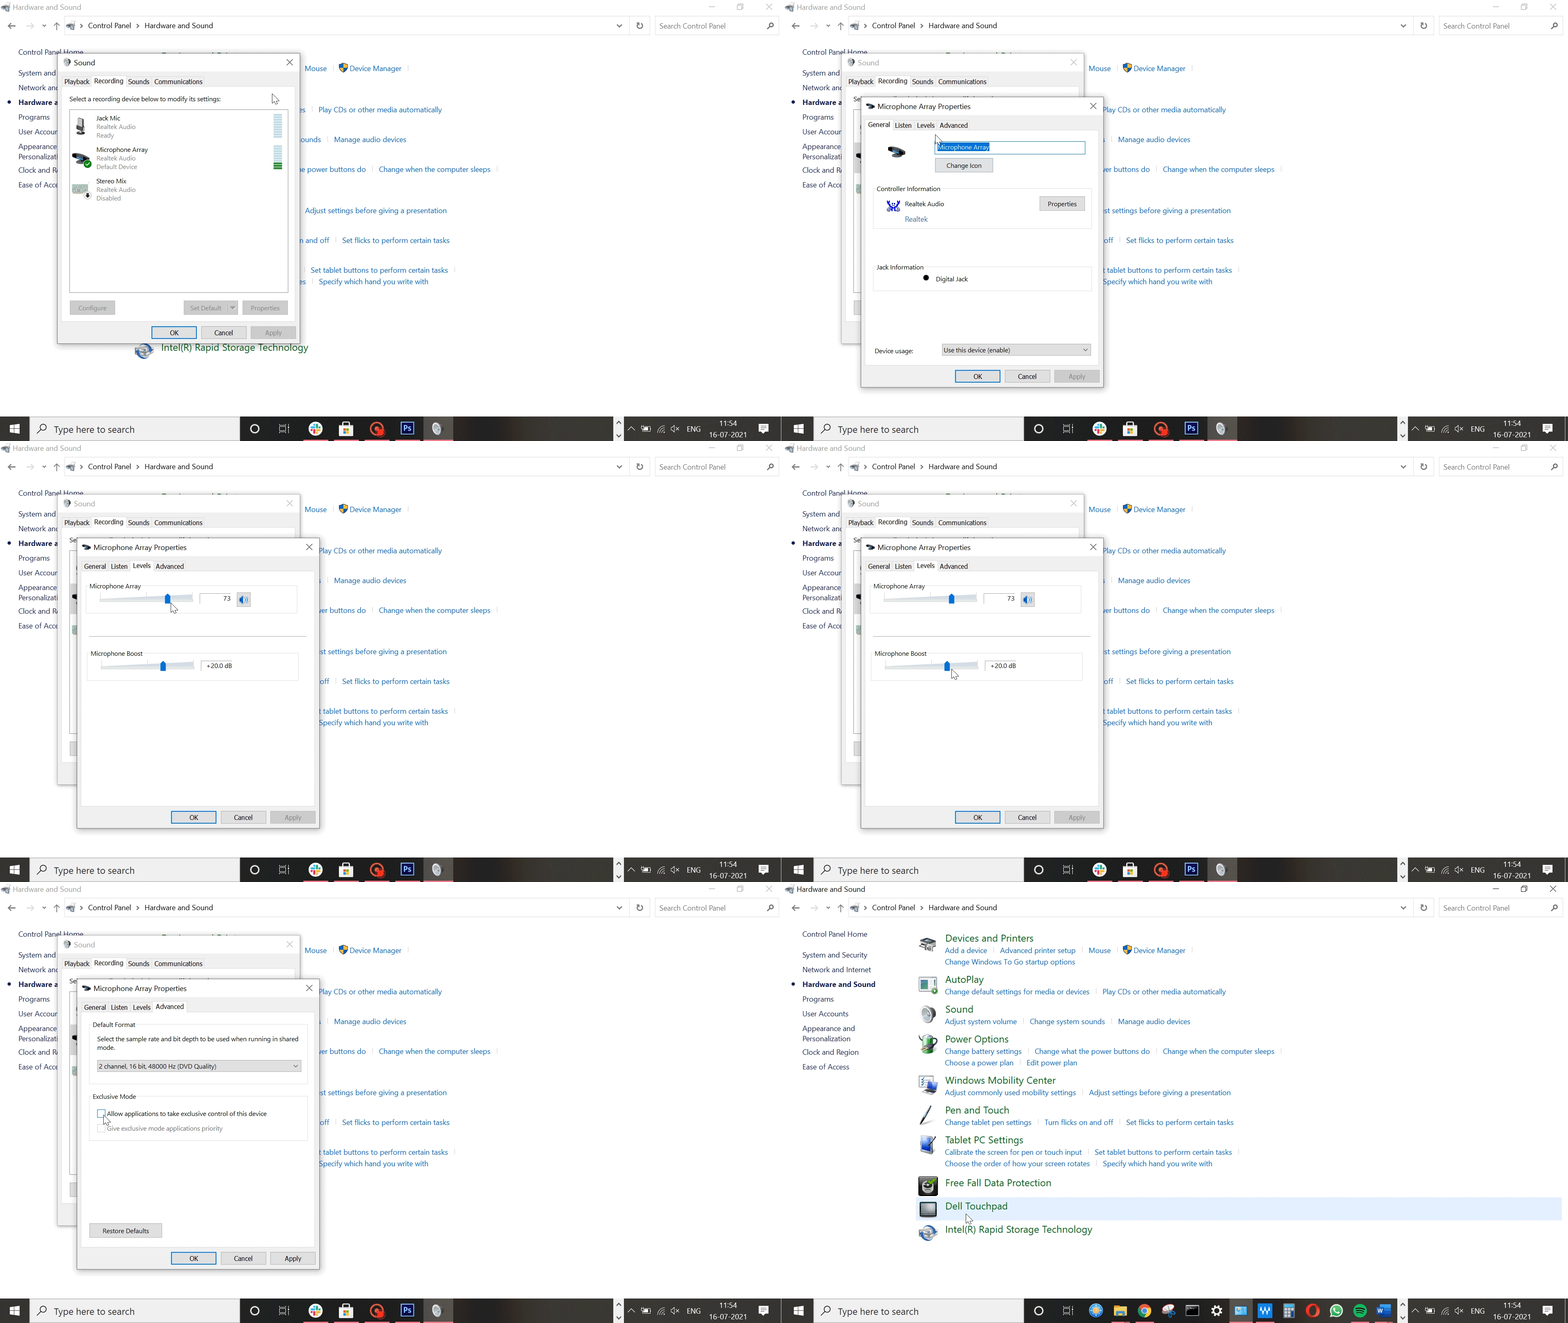
- Type “Control Panel” in the Windows search bar and click to open.
- Click on “Hardware and Sound”.
- Click on “Sound” - this should open a new window.
- Click on the “Recording” tab at the top.
- You can see a list of available input devices. First choose the microphone you are using by clicking on it and then clicking “Set Default” at the bottom.
- Make sure that the volume indicator bars next to your selected mic are lighting up as you speak. If the levels aren't moving, the microphone may not be plugged in correctly, powered off, or a volume knob turned too low. To adjust the levels see steps 7-9

- Now select the chosen microphone and click on “Properties”. This should open a new window where you can change your sound settings.
- To adjust audio levels, click on the “Levels” tab at the top. Here you can make sure you are not muted and you can adjust levels.
To set the levels correctly, follow 3 simple rules.- Even when you are maximum voice energy (yelling), the microphone should not reach the top of the bar.
- When you are talking normally (like during a broadcast) it should be between 40% and 60% of the full meter.
- When you are silent there should be no activity. If there is activity the levels are too loud.
- We strongly recommend disabling Automatic Gain Control (AGC). AGC is a technology for web audio conferencing (Zoom etc) that automatically varies your audio levels. This is very bad during a broadcast as it makes it hard to set the mix with the background sound correctly. To disable AGC, click on the “Advanced” tab at the top and uncheck the “Allow applications to take exclusive control of this device” option.

Comments
0 comments
Please sign in to leave a comment.