This article is intended to help you if you are having issues connecting to the Spalk system.
Check if you have a certificate trust issue
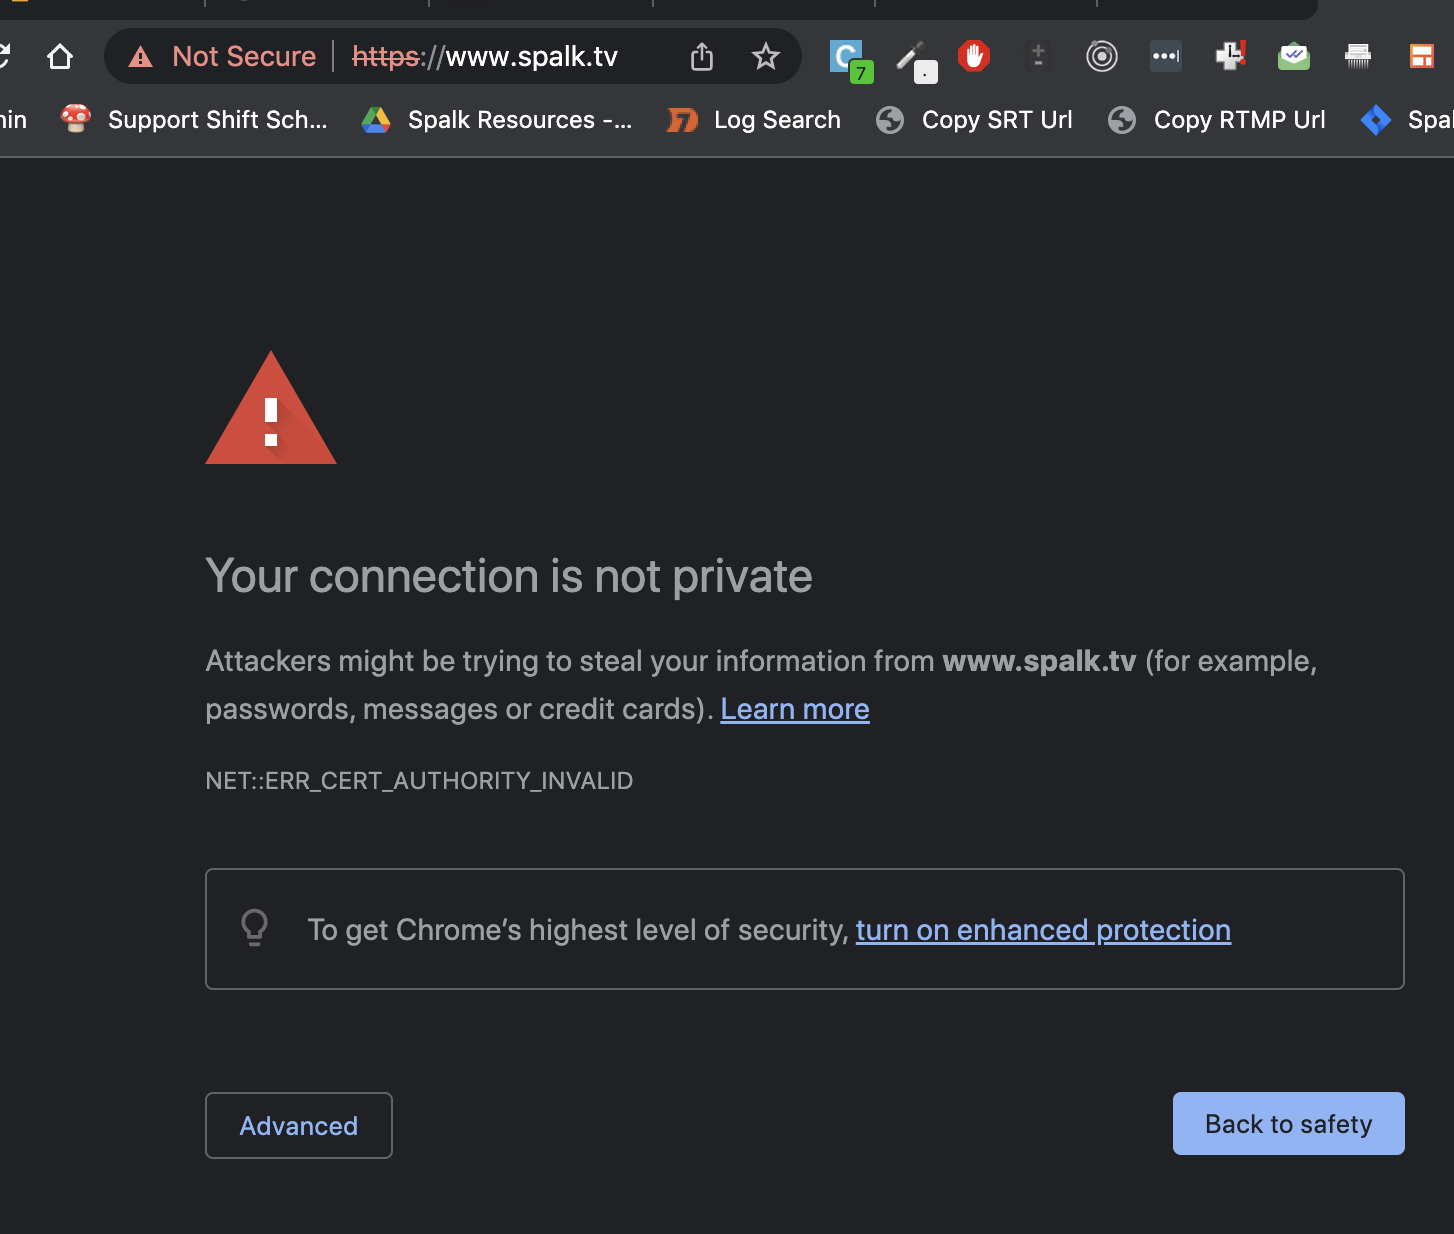
Occasionally there is an issue where your system doesn't trust Spalk's certificates, so you cannot connect to Spalk. To test if this is the case, visit https://www.spalk.tv . If the browser shows "Your connection is not private", you may have a certificate trust issue. Follow the steps here to quickly resolve this.
Update your DNS Settings
Sometimes, your internet service provider (ISP) can interfere with the Domain Name System (DNS), which causes your browser to be unable to contact the Spalk system. Helpfully, Cloudflare runs a free, fast and secure public DNS resolver.
Quick links:
Update DNS settings on Windows 10
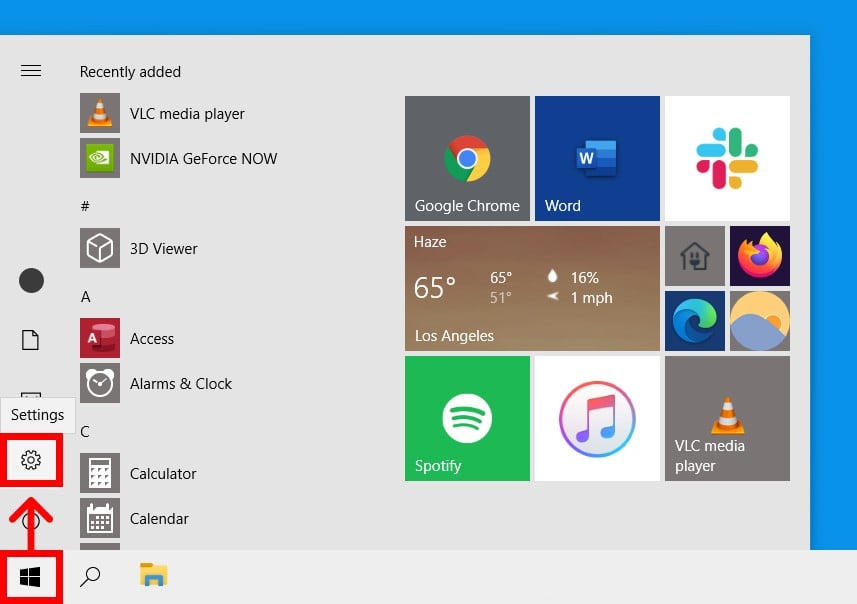
- Open the Windows Start Menu. You can do this by clicking the button with the Windows logo in the bottom-left corner of your screen.
- Then click Settings. This is the gear-shaped icon just above the power button.
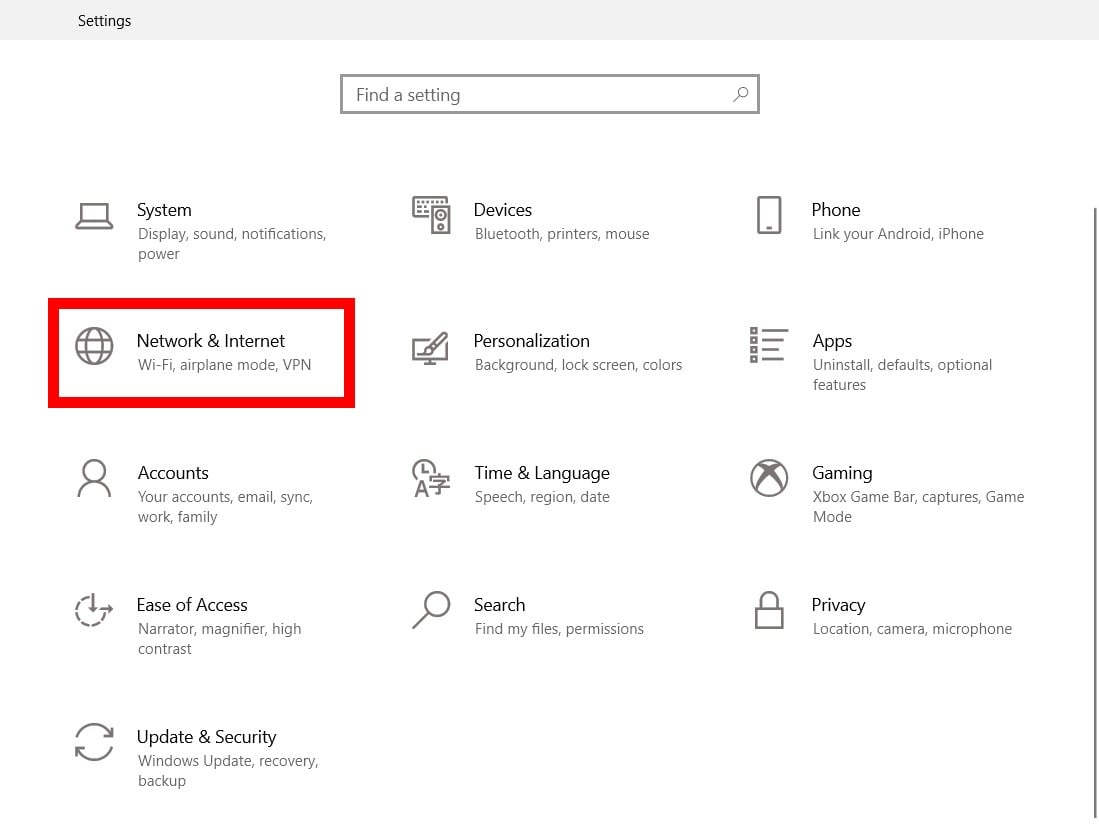
- Next, select Network & Internet.
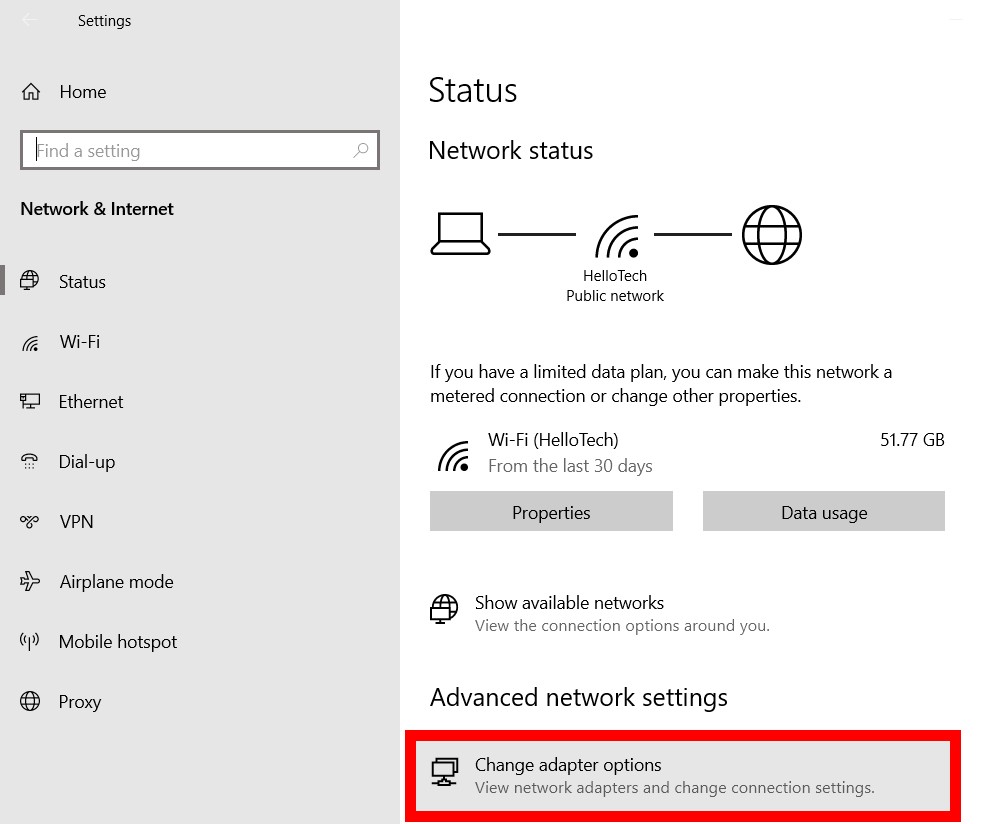
- Then click Change adapter options. You will see this under Advanced network settings.
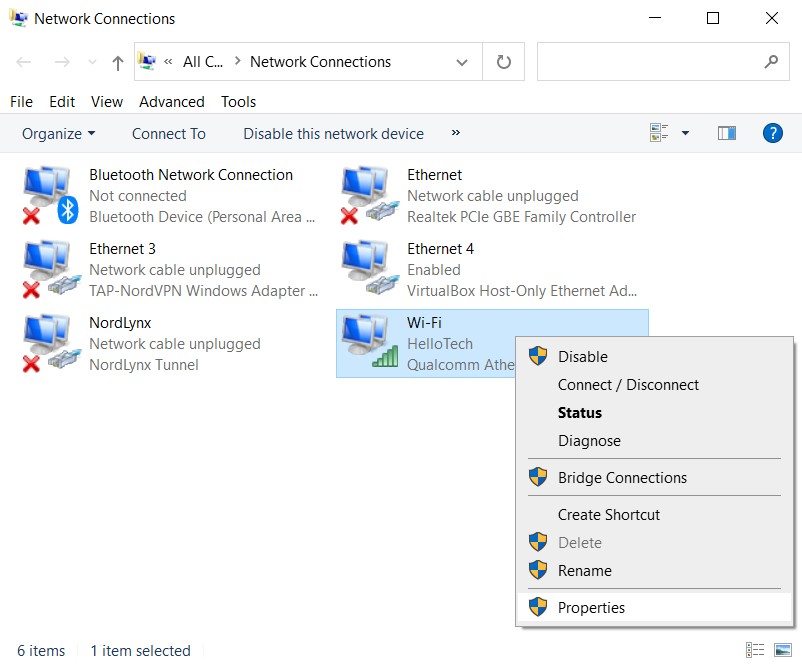
- Right-click on the connection you want to change the DNS server for. If you are connected via WiFi, select that. If you are connected via Ethernet, select that. You will know which connections you are currently using because they will have green bars, while the connections that are not in use will have a red X.
- Then select Properties. This will be the last option in the pop-up menu.
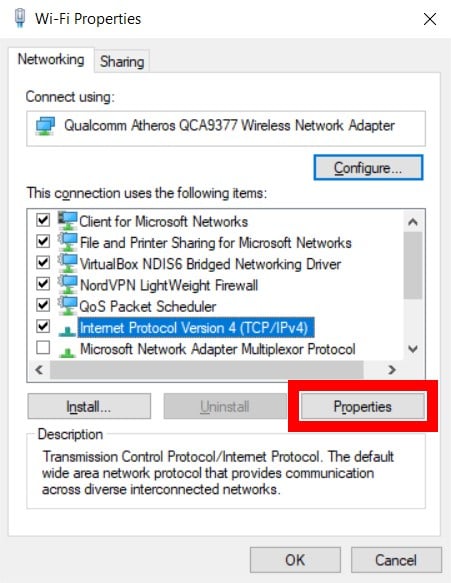
- Next, select Internet Protocol Version 4 (TCP/IPv4). If you don’t see this option, use your mouse to scroll up and down the selection.
- Then click Properties.
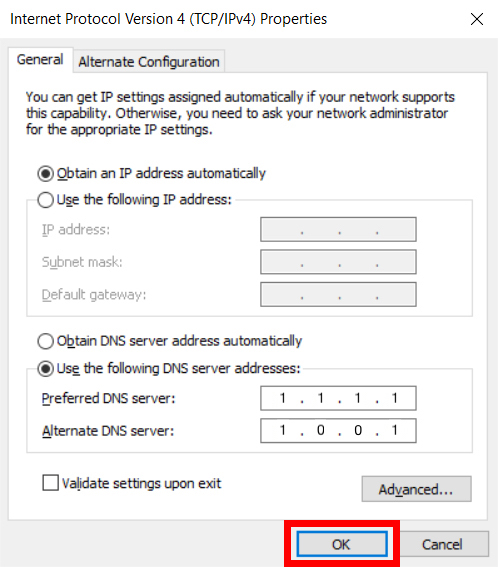
- Next, click the radius next to Use the following DNS server addresses. You will see this in the bottom half of the window.
- Then enter a new DNS address. You will also want to add a secondary DNS server address in the following line.
- Finally, click OK. You will see this at the bottom of the window. Your changes won’t go into effect until you click OK.
- Once you have updated your DNS settings, clear your chrome DNS cache by visiting chrome://net-internals/#dns and clicking "Clear Host Cache"
Update DNS settings on a Mac
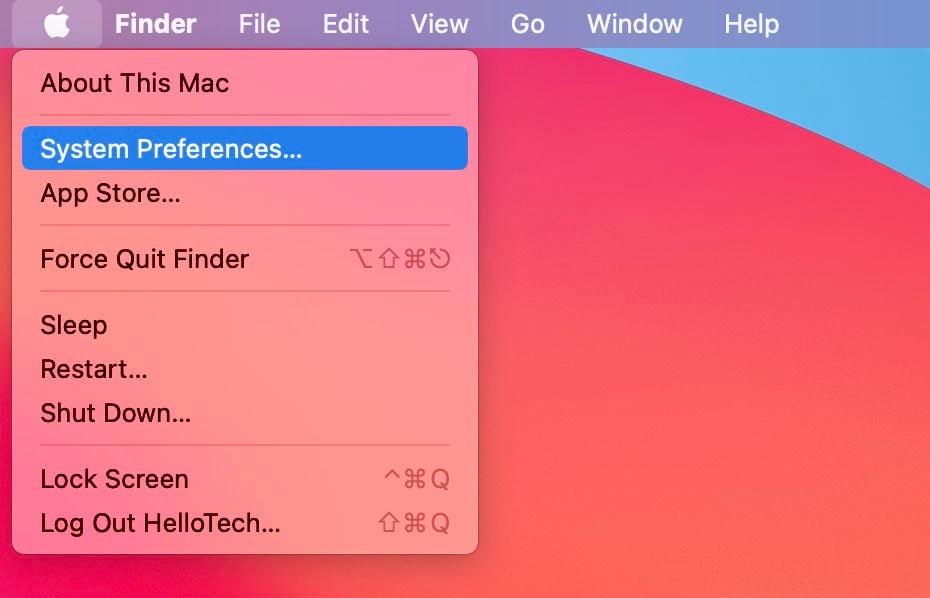
- Click the Apple icon in the top-left corner of your Mac’s screen.
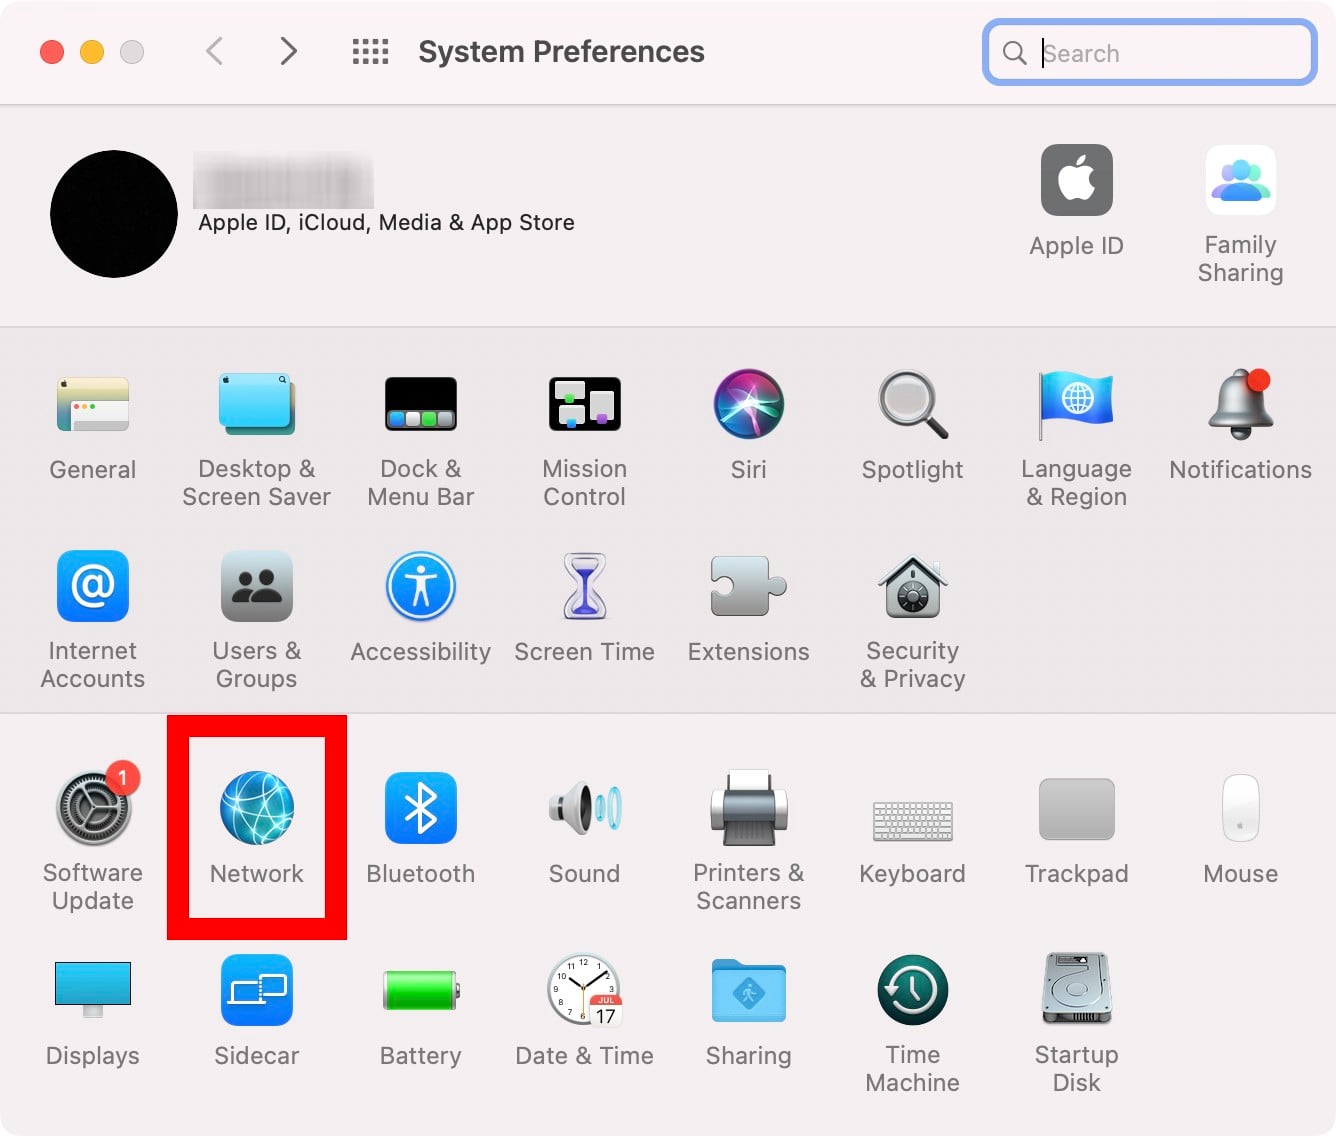
- Then select System Preferences.
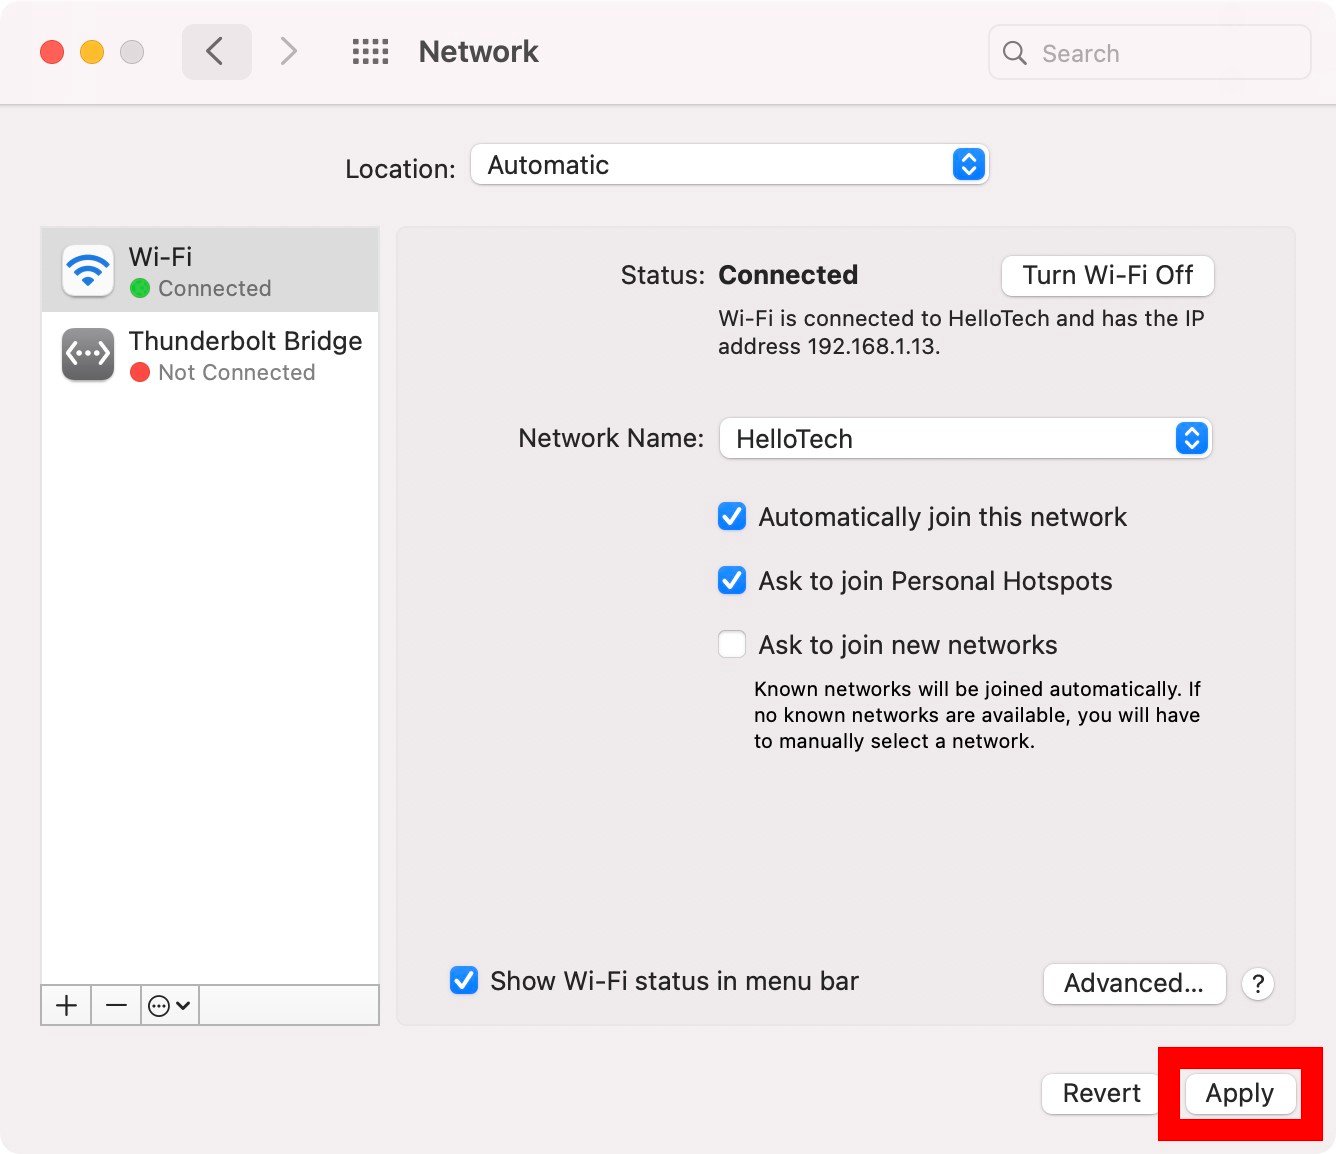
- Next, select Network.
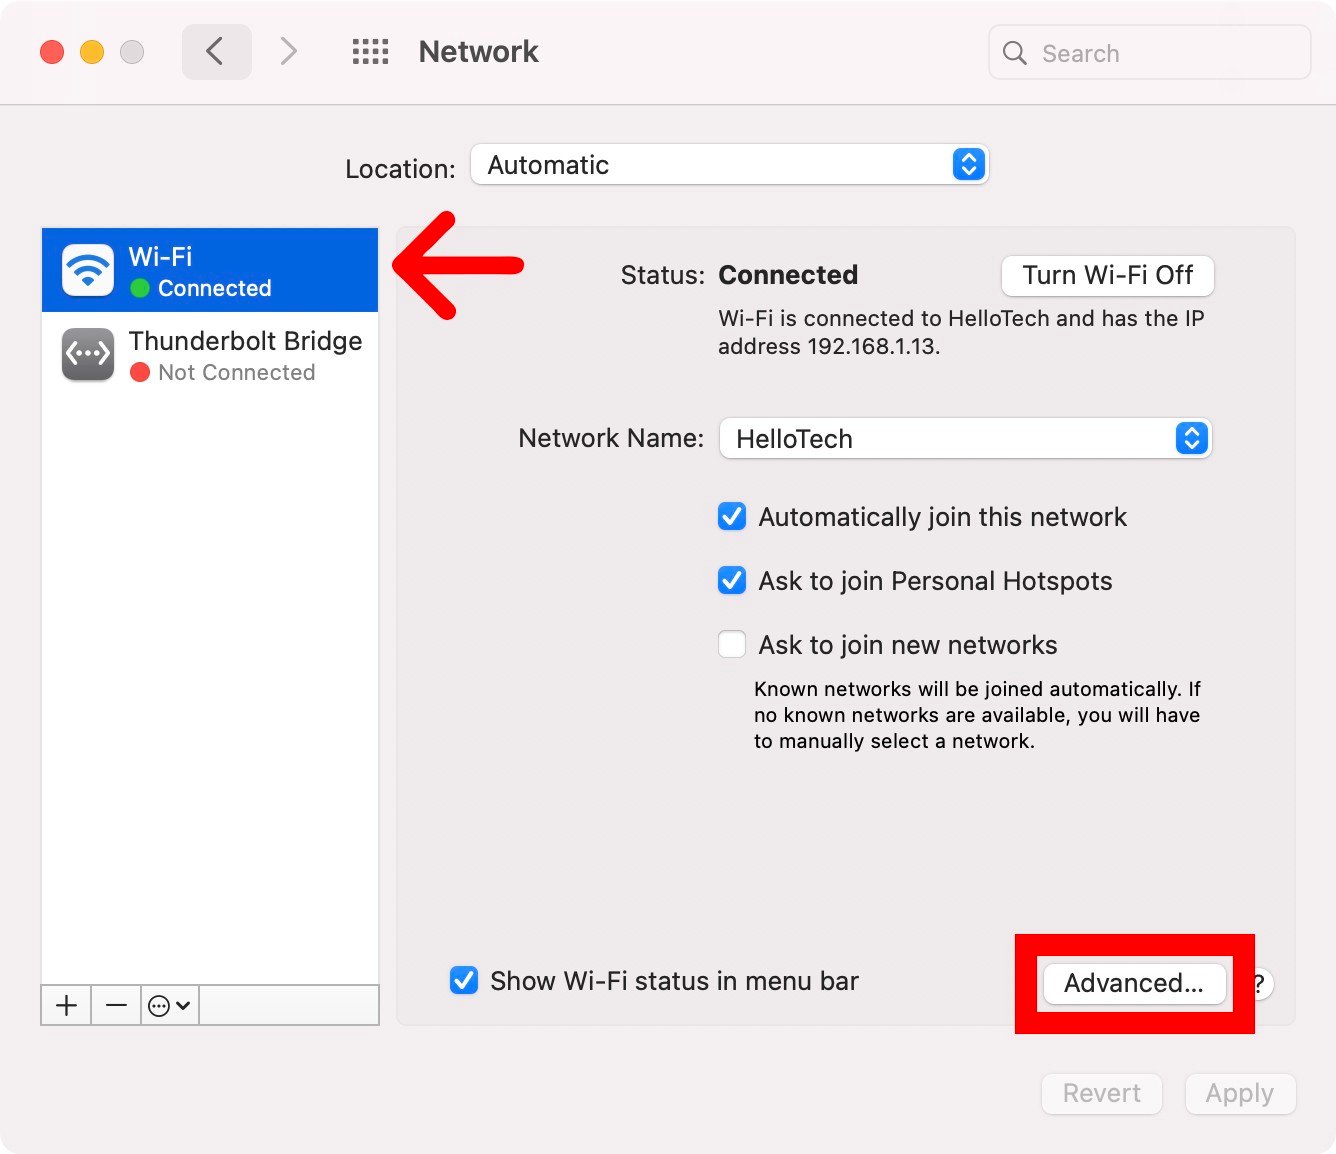
- Then select the connection that you want to change DNS server for. You will see all your different network connections in the left sidebar. You will know which connections you are currently using because they will have a green circle, while the connections you are not using will have a red circle.
- Then click on Advanced. You will see this in the bottom-right corner of the window.
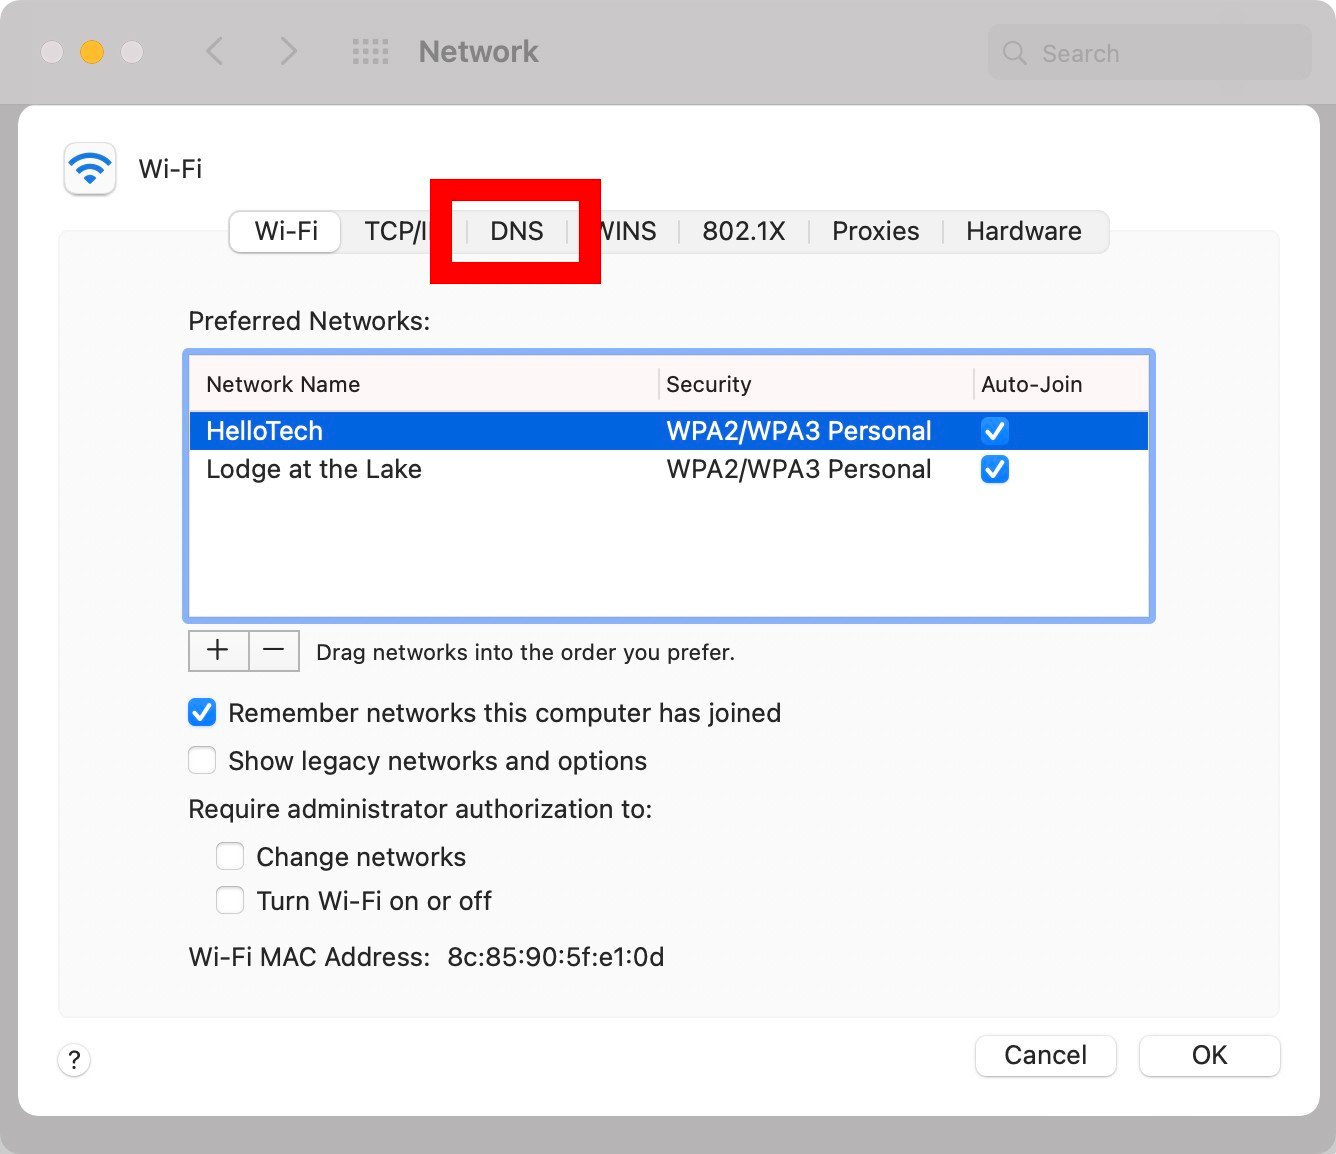
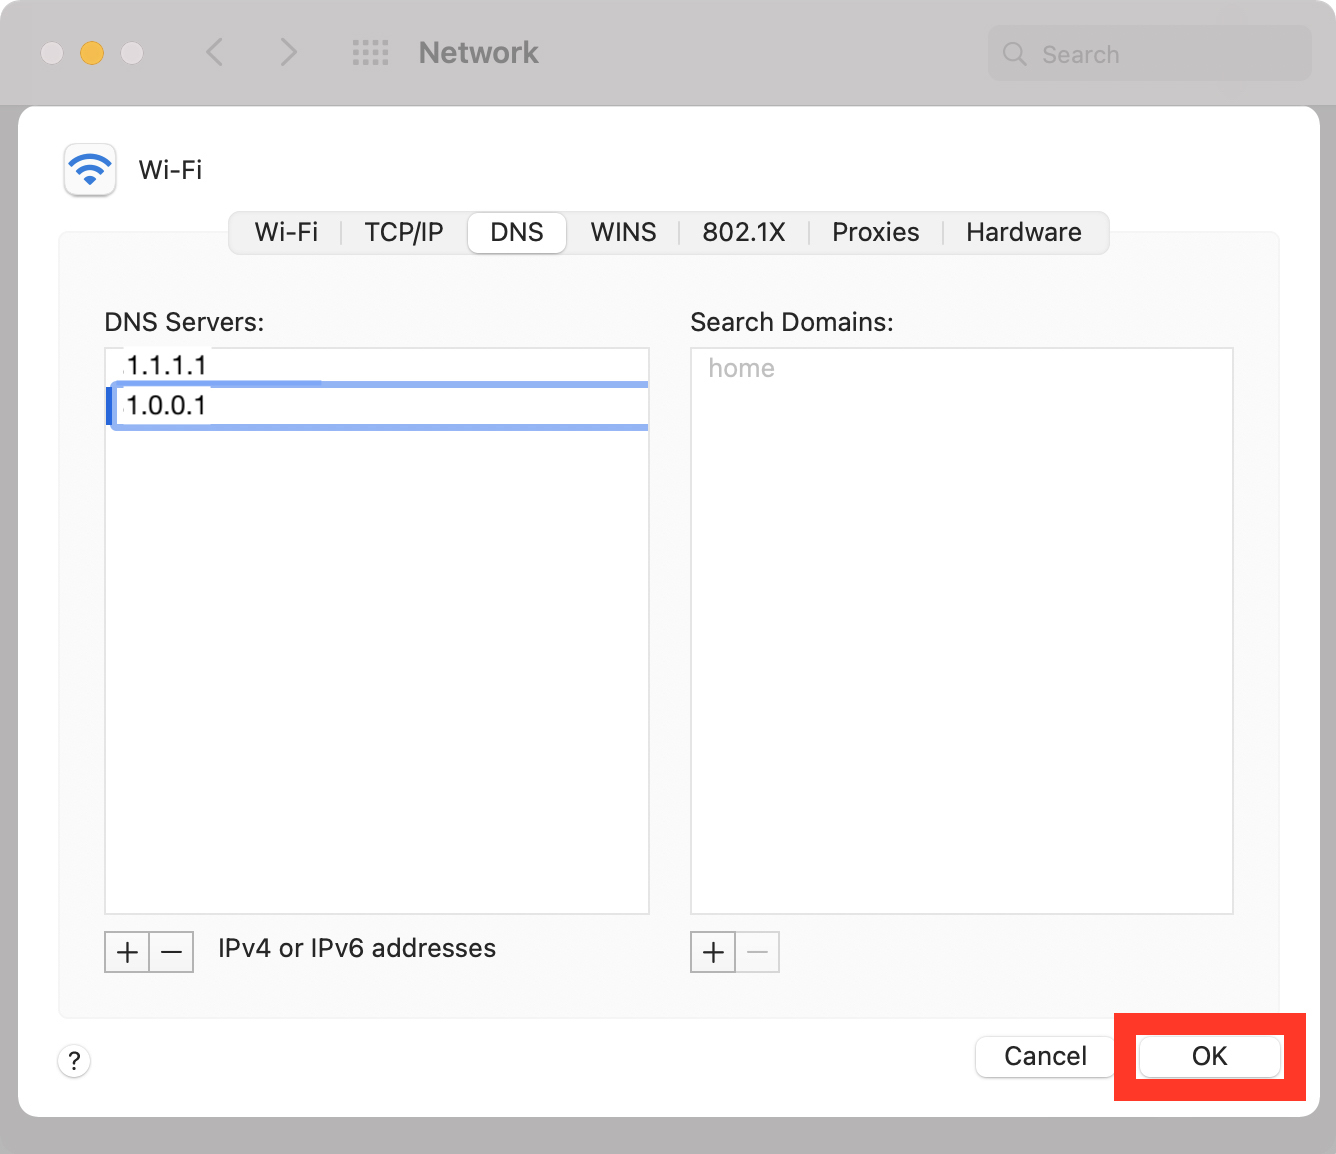
- Next, click on the DNS tab. You will see this at the top of the window.
- Then click on the plus icon (+). You will see this at the bottom of the DNS Servers pane.
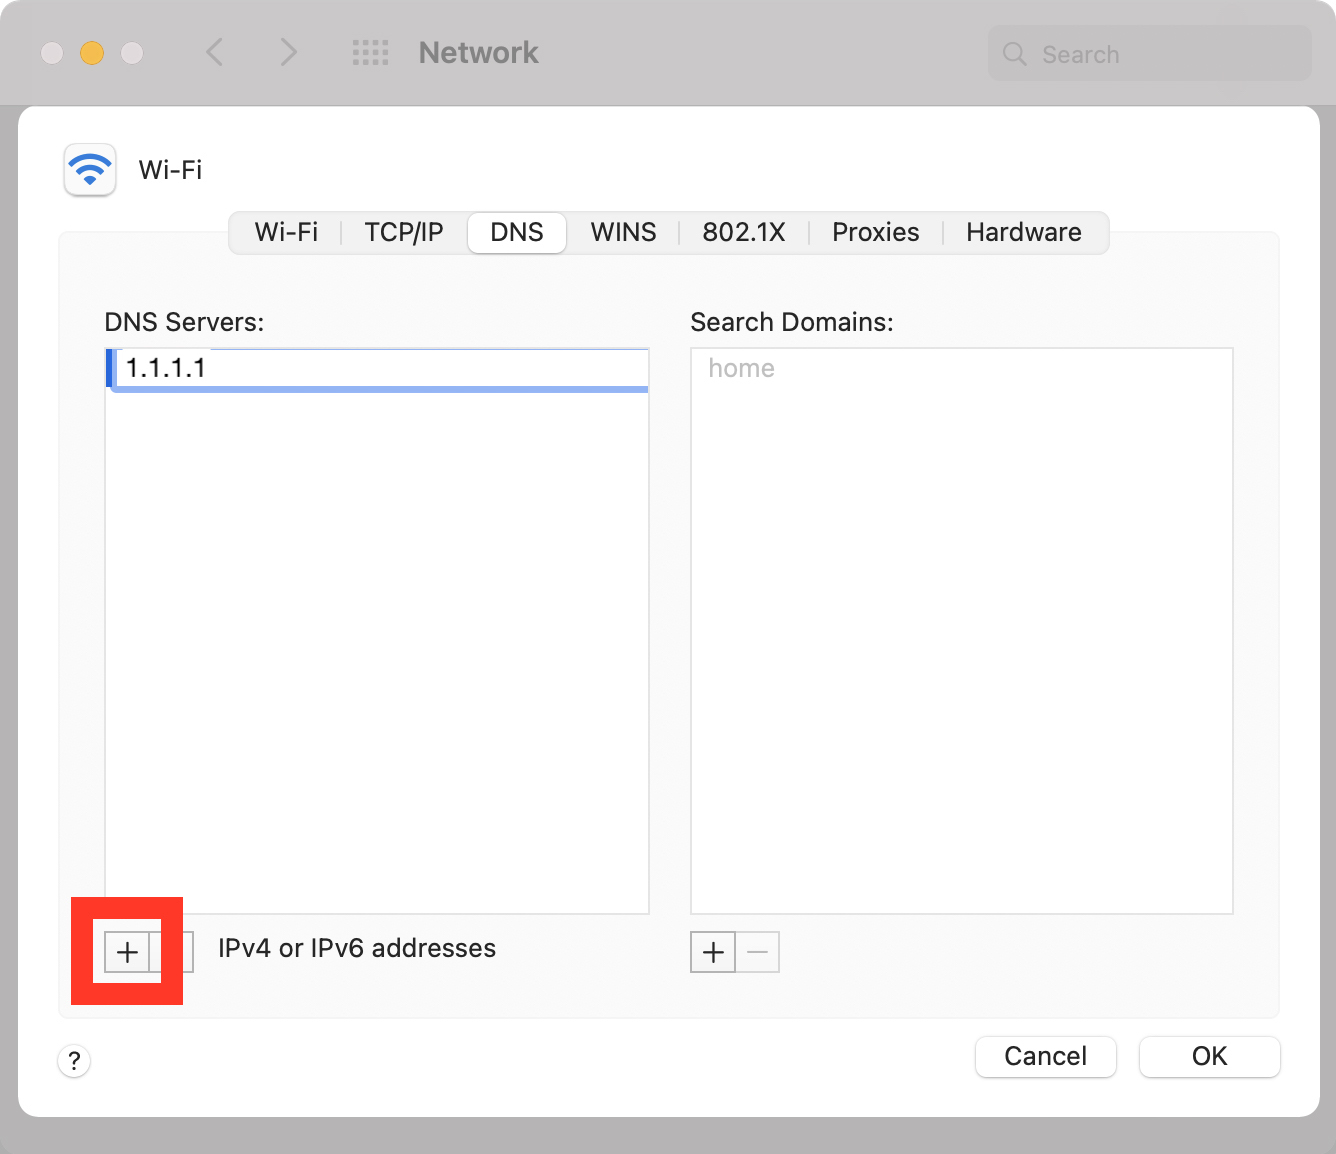
- Then enter new DNS addresses. You will want to enter a primary and secondary DNS address. When a URL needs to be resolved, your Mac will query the first entry on your DNS server list. If no response is received, it will move on to the next entry. This will go on and on until a response is received or when all servers have been queried.
- Next, click OK. The Advanced window will close, and you will be brought back to the Network window.
- Finally, click on Apply. Your changes won’t go into effect until you click Apply in the Network window.
- Once you have updated your DNS settings, clear your chrome DNS cache by visiting chrome://net-internals/#dns and clicking "Clear Host Cache"

Comments
0 comments
Article is closed for comments.